


We all know how it feels to run tests and see those sweet and beautiful green dots... or get sad and desperate from unexpected red marks (ok, I know I am being over dramatic here lol). Most (if not all), testing libraries will show the results as you would expect, but generating a report will give much more than a console output could. Reports can be easily seen by the whole team, we can store history information and observe better how our tests results vary between runs. This post will teach you how to start using allure for reporting together with mocha (which will be our testing library).
So, for starting, let’s get to know allure and mocha. 🙂
Allure
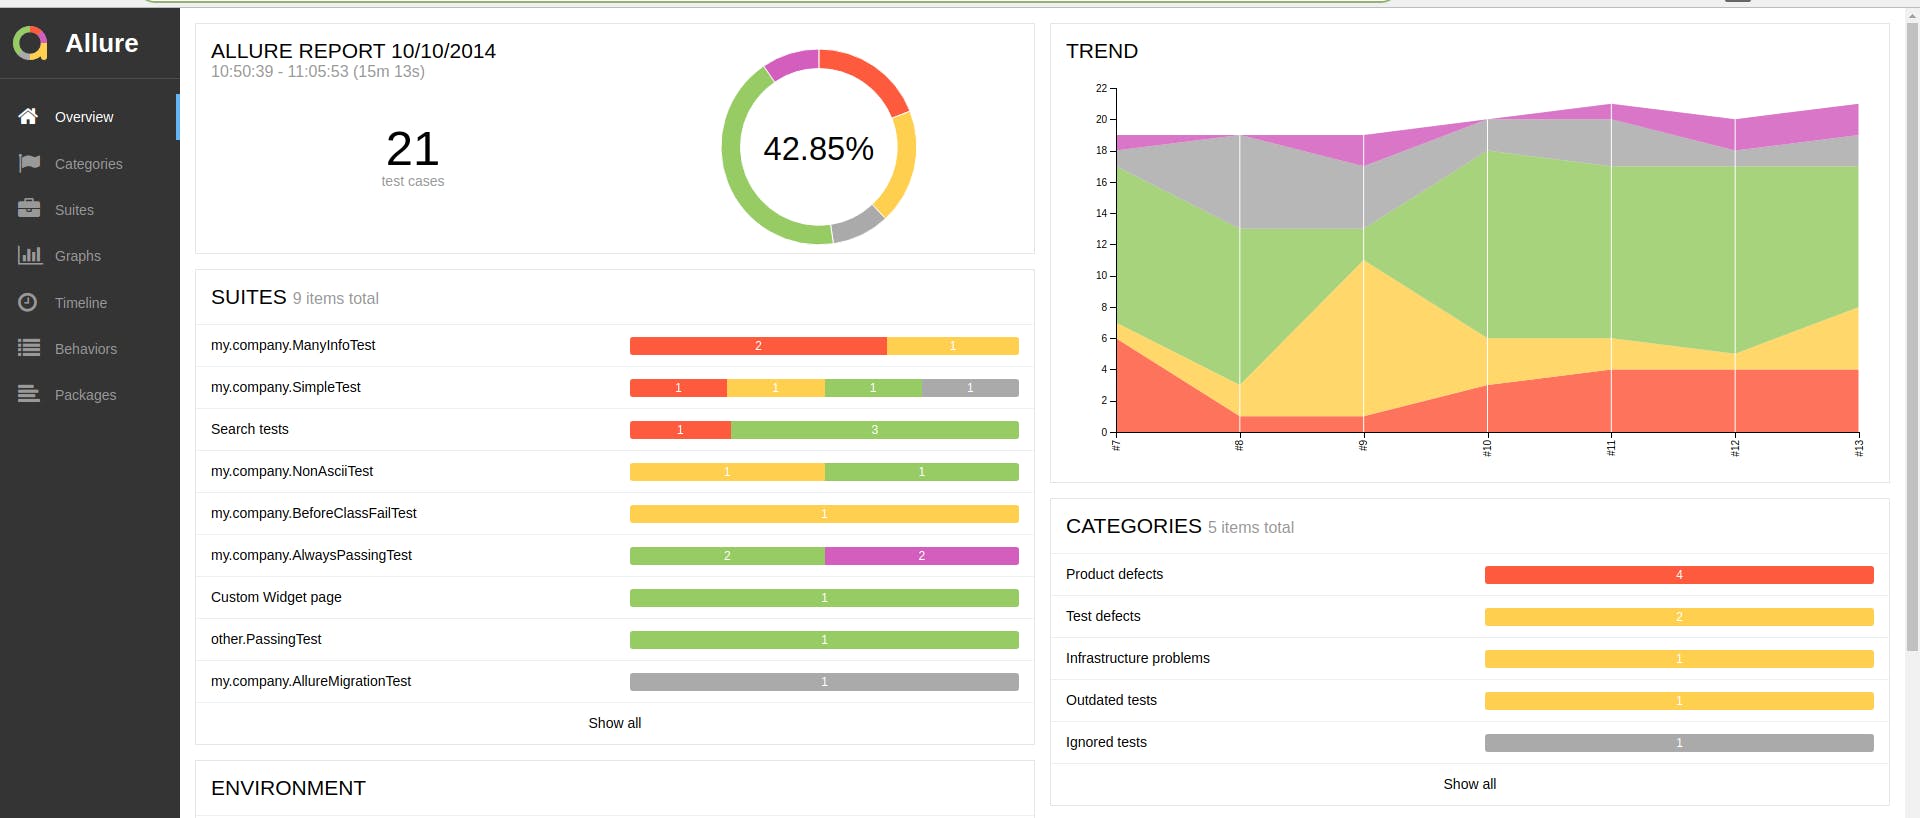
Allure is an open-source tool solution to generate test execution reports and it can be used with different languages and xUnit testing libraries. Inside the report we’ll have information about the tests that passed, were skipped, those that failed/showed defects and much more. We can look at a demo of an allure report right here.
Mocha

According to their site:
"Mocha is a feature-rich JavaScript test framework running on Node.js and in the browser, making asynchronous testing simple and fun"
And they certainly aren’t lying 😄. Also, it's nice to highlight that mocha will feel very familiar if you are used to testing in javascript by using jasmine or jest.
Besides those two, we’ll be using a couple of npm packages that will make the test report generation way easier for us. On our list we have:
- mocha-allure-reporter and mocha-multi: Those will get our mocha test results into
.xmls(a suite per file) and store them inside a folder calledallure-results; - allure-commandline: After populating the
allure-resultsdirectory we need this command to actually generate the HTML report with our results on it.
Now that we have the packages we can go forward and run our tests and generate the report. We will do it using:
multi='spec=- mocha-allure-reporter=-' mocha
This will run the tests and we will be able to see the results in our console as we normally would, but with addition to that we will notice the creation of the allure-results and it’s possible to see the .xmls there as well.
After running tests, we need to run:
allure generate allure-results --clean -o allure-report && allure open allure-report
This will create a new and clean allure report for us and we will be able to access it by clicking on the link that will be generated and prompted to us on the console.
To track the history of your tests you need to copy (after the first run) the allure-report/history folder to allure-results/history, and after each test run will have updated results with updated history information.
In case you want to do this by command (which I recommend) you could add this piece before the previous one:
mkdir allure-results/history || echo "history folder already in place...continuing :)" && cp allure-report/history/* ./allure-results/history && echo "Allure trends updated!"
The whole thing would look like this (yea, it's not pretty lol):
mkdir allure-results/history || echo "history folder already in place...continuing :)" && cp allure-report/history/* ./allure-results/history && echo "Allure trends updated!" allure generate allure-results --clean -o allure-report && allure open allure-report
But well, after the second run this is our report:
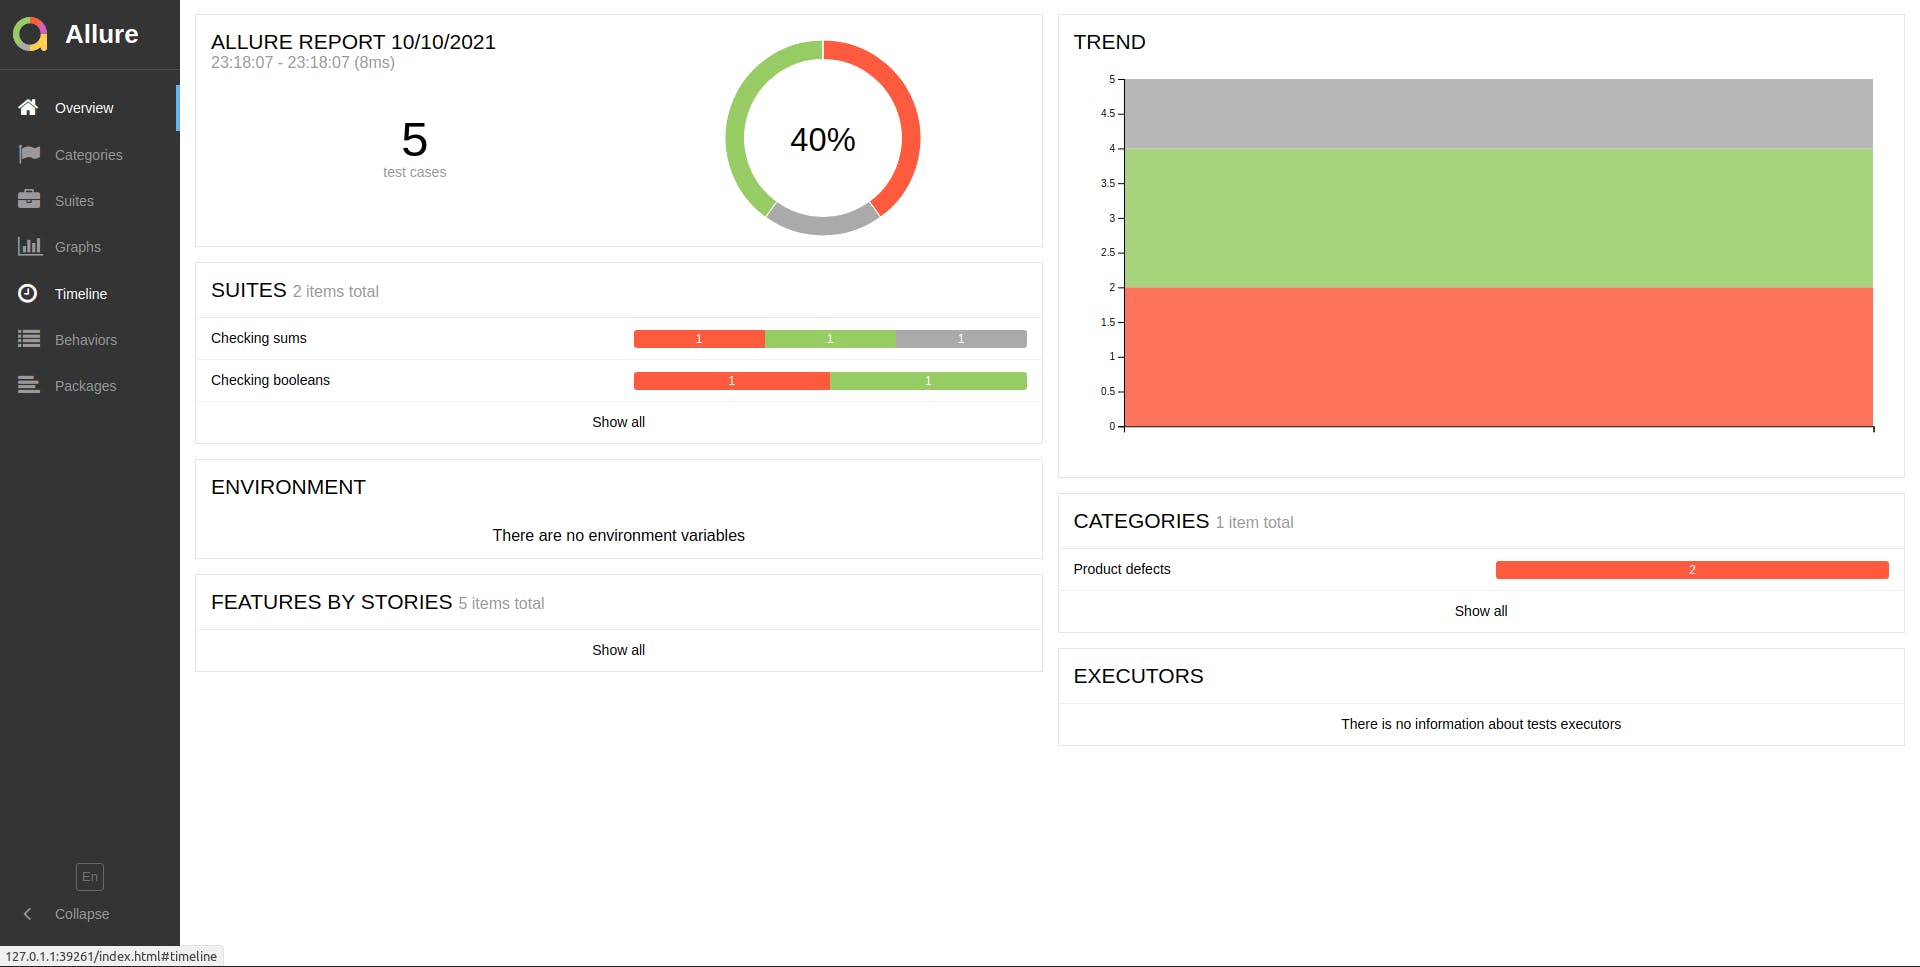
wooo, look at this crispy report with trends 🤤
And that's pretty much it :^)
In this post we covered how to get a basic setup to generate allure reports using mocha.js. As we can see, the setup is really straightforward so you have no excuse to not use it in case you are on mocha 😆. This is just a start and of course we can explore even more with those two or maybe try with another testing library (see jest-allure). The options with allure are very abundant, so choose what you prefer. The important thing is to start tracking test behavior and turn that into benefit for your team!
The code that I did for this post can be found here.
See you next time!